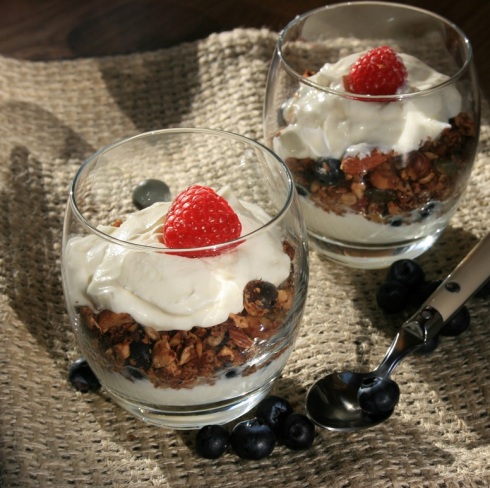
LCHF Coconut Granola

5 Jul

NNG fin2So I sat down to blog again and realised with a back to reality horror that the last time I blogged was NOVEMBER!!!!

In my defense a whole heap of stuff has happened since November.  I started an amazing  new job that is keeping me busy and,  on the odd occasion,  away from home – and it’s hard to blog from a hotel room.  I also started a new diet.  Some foodies have all the luck and are able to eat tons of yummies and still stay slim.  I am unfortunately not one of those foodies.

On a trip back to South Africa earlier this year I was introduced to Tim Noakes’s Real Meal Revolution – which is in essence a low carb, high fat diet – or as he would prefer – a low carb, high fat way of life.   The verdict – I’m hooked.  Weight has been coming off at a nice and steady pace, I don’t feel hungry or for that matter that I’m dieting AND I don’t miss carbs nearly as much as I thought I would.  I have had to make changes to the way I cook and that hampered the blogging, but I’ve had  a few successes and I’m back on track.

One thing that has been difficult has been for me is breakfasts.  Not weekend breakfasts when you have ample time to cook omelets and fry-ups and frittatas, but weekday breakfasts when you’re rushing out the door to beat the traffic. Yogurt works, but lets face it, it can be a bit tedious, so I’ve been playing around with carb free granola and I’ve finally found one I really like.

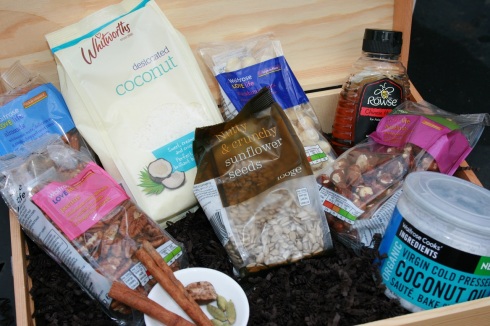
NG INGTo start take:

  • 90ml Coconut Oil
  • 100gms Dessicated Coconut
  • 100gms Pecan Nuts
  • 100gms Almonds
  • 100gms Macadamia Nuts
  • 50gms Sunflower Seeds
  • 50gms Pumpkin Seeds
  • 1 Tbsp Honey
  • Spices to Taste

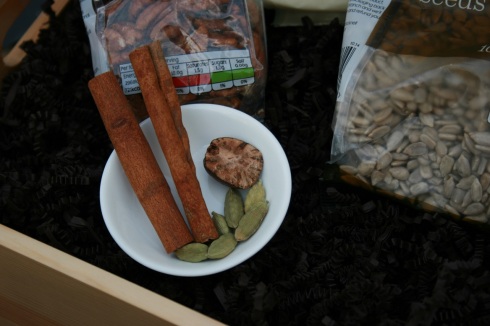
NG SpicesA Note on the Spicing – you can use whatever spicing you happen to enjoy.  I’ve used cinnamon, nutmeg, ginger and cardamom.  I also like mine quite flavourful so I’ve used 2 tsp of cinnamon, 1 tsp of nutmeg and 1 tsp of ginger and then the seeds from 6 cardamom pods.
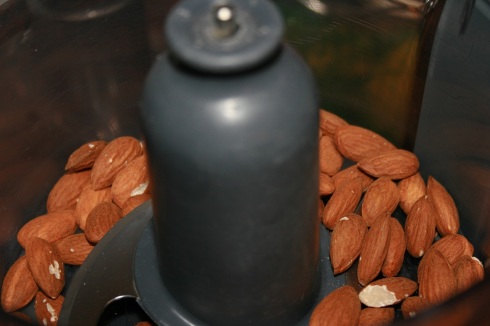
NG ProcessPreheat the oven to 160 °C  and line two baking sheets with parchment paper. Then process your nuts (not the seeds or the coconut) briefly until they are coarsely chopped.
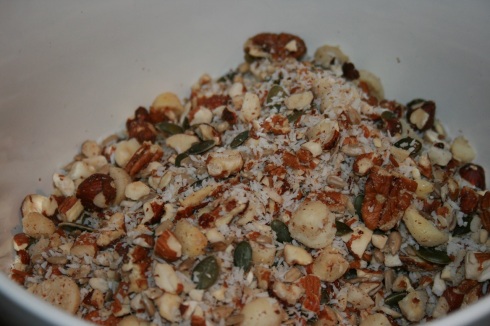
NG MixedAdd the coarsely chopped nuts, seeds and coconut to a large bowl and mix well.
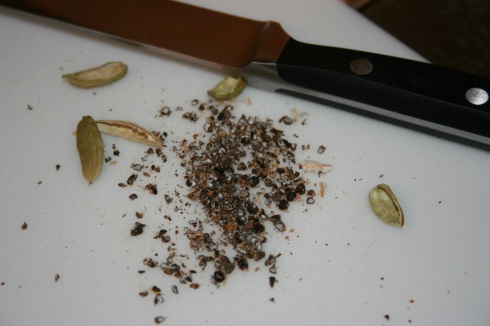
NG CardamonIf you’re using fresh spices – and if you’re not, give it a try as the flavours are SOOOOO much better – chop, grate and grind your spices.
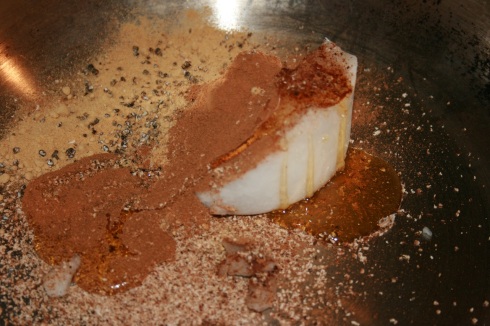
NG PanIn a large pan (I used my wok) add the coconut oil, spices and the honey and heat over a low heat until the coconut oil has melted and the honey is runny.
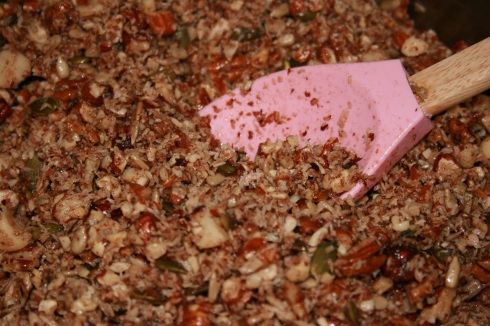
NG CoatAdd the nut mixture and stir to coat it evenly in the oil and spice mix.
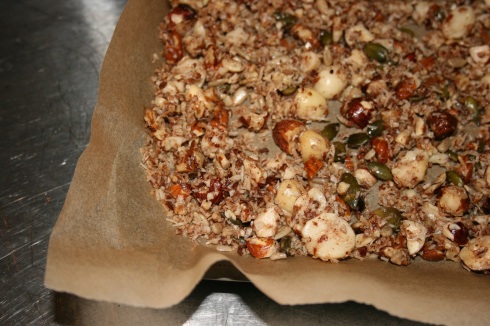
NG Baking Tray 2Spread the granola mix evenly out over the two trays and place them in the oven for 20-30 minutes until the nuts are golden and toasty, but keep an eye on them to make sure they don’t burn as this will make your granola quite bitter.
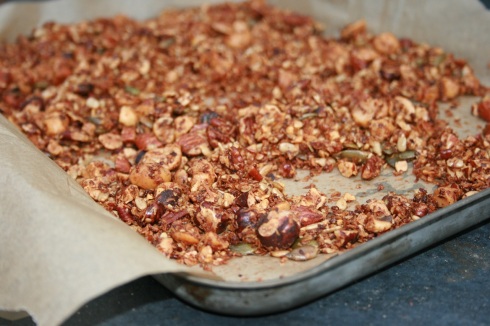
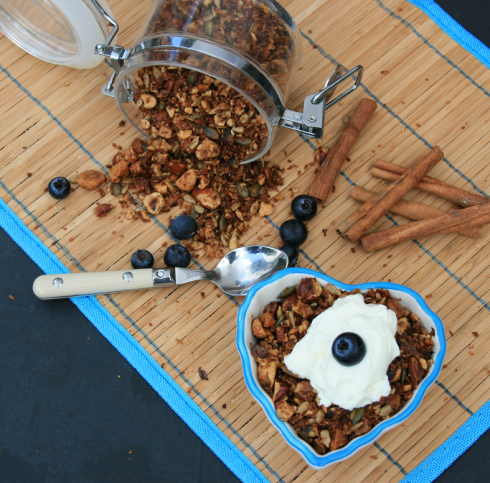
NG ToastedLeave the mix to cool to room temperature and store in an airtight container.

NG fin2

Add a dollop of yogurt, a sprinkle of blueberries and enjoy!

Camembert Stars

9 Nov

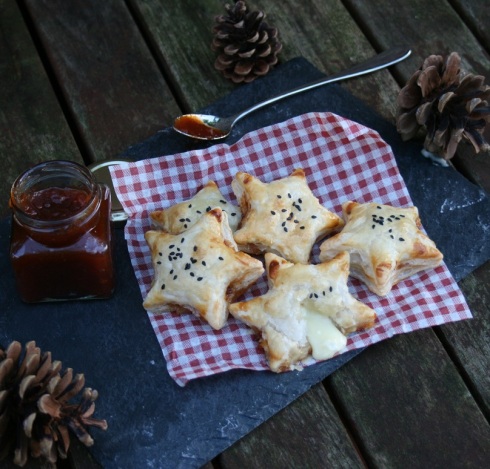
Camembert StarsSo Halloween has come and gone and in my book that means it’s time to start getting excited about Christmas! I adore Christmas and lets face it – what’s not to love?  You get family and friends time, pressie time and most importantly to me FOOD TIME!  But with all those times happening,  the one thing I tend to be quite short on is time itself.  Enter my best friend when it comes to canapés – store bought puff pastry.  I think it’s okay to admit you don’t make your own puff pastry because let’s face it, with the exception of sweaty contestants on the Great British Bake Off, NOBODY makes their own puff pastry.
You can do wonderful things with puff pastry that are super easy and yet still manage to knock the socks off of the people you are feeding.  Take these savoury palmiers or seeing that it is almost the silly season, these melty-cheesey puff pastry stars that only need 4 ingredients.

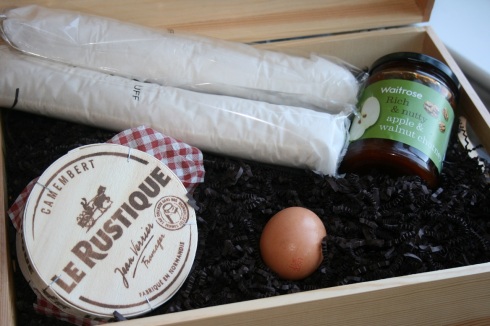
CS INGTo make twelve stars take:

  • two sheets of puff pastry
  • a camembert round
  • a chutney of your choice (I went for an apple and walnut because it felt quite Christmasy, but cranberry or sweet chilli would also work beautifully.)
  • and an egg.

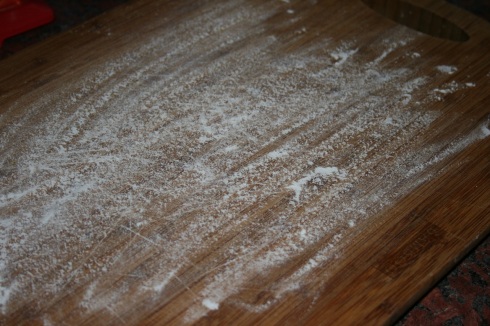
CS PrepPreheat the oven to 200°C and then dust the surface you are working on with a quick shake of flour and place one sheet of puff pastry on top.

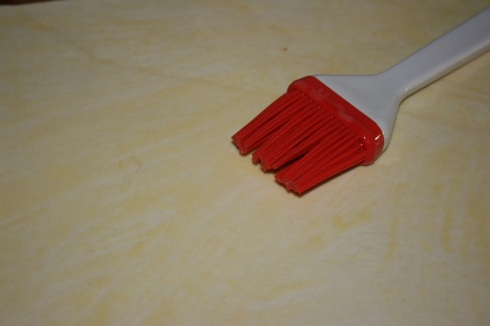
C Egg WashBeat the egg and brush it liberally onto your pastry. Don’t throw the egg wash away -you’ll need it a bit later.

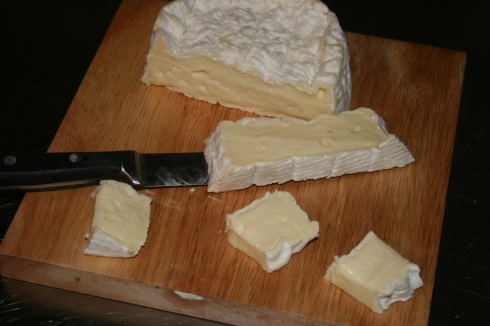
CS CheeseCut your cheese into twelve bite sized chunks. This will only use about half the round of camembert – save the rest for crackers!

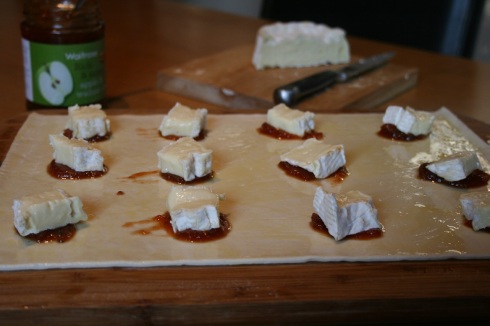
CS fillingPlace about half a teaspoon of chutney on your egg washed sheet of pastry and then place a chunk of the cheese on top of that.

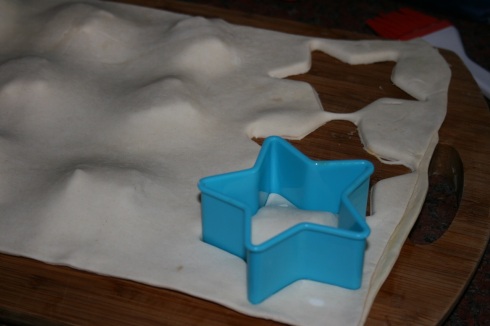
CS CuttingPlace the second sheet of pastry on top of the first one.  Then using a star-shaped cookie cutter cut out twelve stars.

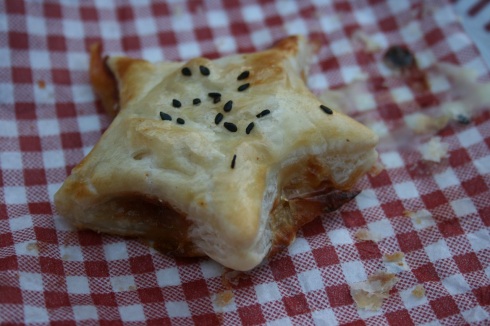
CS Wash and toppingPlace your stars on a baking tray lined with parchment paper.  Use the rest of the egg wash to wash the stars and if you want sprinkle them with some sesame seeds to give them some character.

CS GBD

Bake until golden brown and delicious – about twenty minutes and then bite into the most amazing melted cheesy bit of gooey goodness. ENJOY!

Champagne and Raspberry Jelly (Shots)

15 Sep

CRJ Final shot 4So there comes a time in your life when you realise that no matter how much you want to deny it, you are too old for vodka jelly shots . . . and well, they’re just not quite appropriate to take in to work.  Which really sucks because they would liven up Monday meetings no end.  BUT thankfully all hope is not lost because while vodka jelly shots are taboo, champagne jelly shots (or sparkling wine – for my more pedantic readers) is elegant, sophisticated and perfectly above board.  In fact with the glorious weather we’ve been having, they are my new favourite summer dessert.  If you decide that you are too old for shots, even champagne jelly shots, don’t despair – set the jelly in a martini glass or a posh tumbler and you had a wonderfully elegant end to a summer meal.

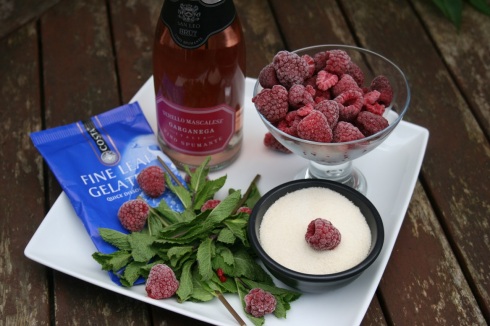
CRJ IngTo start take:

  • 375 ml of pink sparkling wine
  • 400 ml of water (use bottled or filter water for a clearer jelly)
  • 4-6 leaves of gelatine (4 for a soft set jelly – easier to swallow; 6 for a firmer spoon-able jelly)
  • 100 gm golden caster sugar
  • raspberries
  • mint leaves (optional – I left these out, but chop them finely and add when adding your raspberries for a delicious alternative)

This will make about 18 double shot glasses of jelly or 6-8 larger portions.

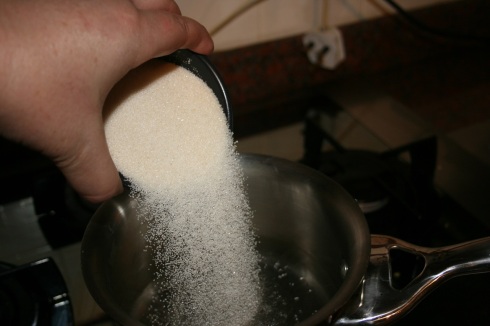
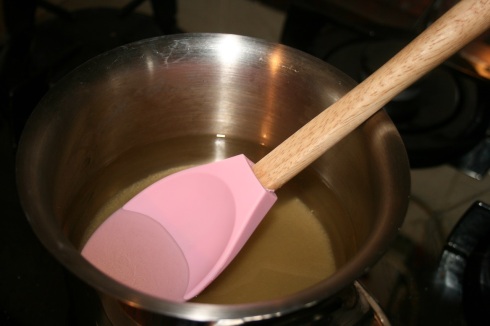
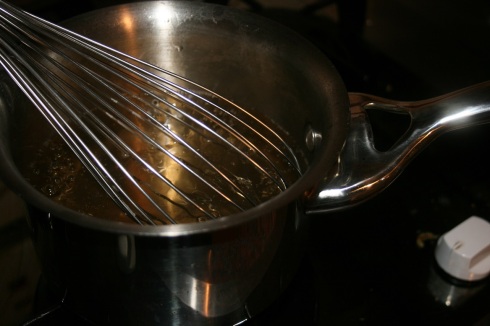
CRJ SugarPut the water in a small saucepan over a medium heat and add the sugar.  CRJ SimmerStir the mixture to dissolve the sugar and then bring the water to a boil and leave to simmer for about five minutes.

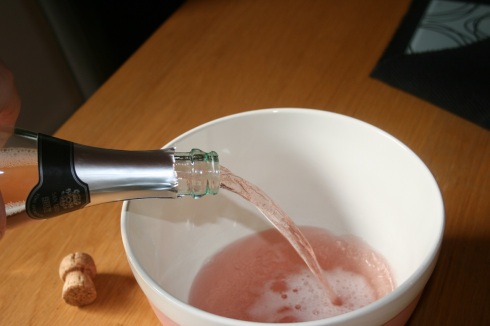
CRJ ChampersPour the champagne sparkling wine into a heat-proof bowl.

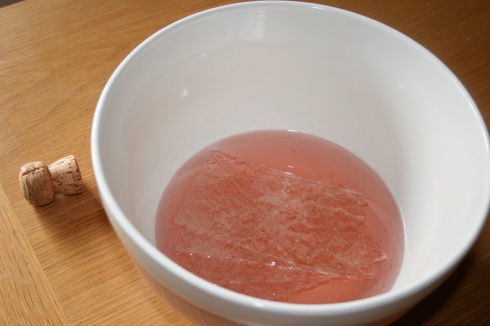
CRJ GeletinPlace the gelatine in the sparkling wine and leave to soak for about five minutes.

CJR WhiskRemove the gelatine leaves from the sparkling wine and add to the hot sugar mix in the saucepan and whisk until the gelatine has dissolved completely.

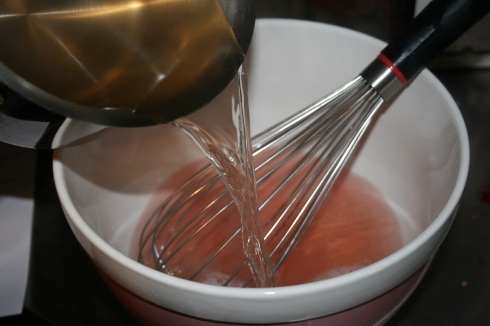
CRJ MixAdd the sugar mix to the sparkling wine and whisk to combine.  Leave to cool for about an hour.

CRJ ShotsOnce the jelly mixture is cool pour it into the molds you have set aside and place these in the fridge for about an hour until the jelly is just starting to thicken.  Place the mint and raspberries into the jelly and leave to set.  If you are doing shots I wouldn’t place more than one raspberry in the glass as it could be a choking hazard, if you’re doing them in large glasses throw in as many as you wish.  Place back in the fridge for  6-8 hours until set.

CRJ FinishedEnjoy and bottoms up!

BBQ Spices

5 Jul

BBQ Spice

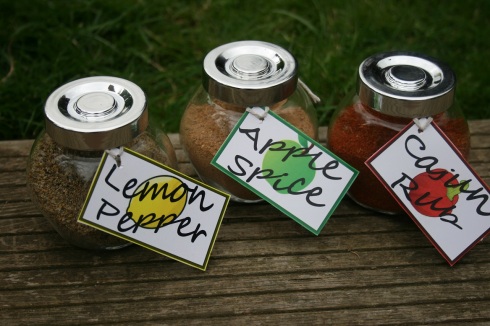
So I’m sure I’ve mentioned on more than one occasion that as a South African, albeit one living in the UK, Barbecuing (braaing) borders on religion.  Commandment number 1 – Whenever the weather presents an opportunity meat will be thrown onto flames and charred until done.  Which is great and delicious, but sometimes well – excuse me a sec while I duck out of lightning range – it can get a little boring. Seeing as there is no wriggle room in commandment one and seeing as it has been a truly lovely summer thus far I had to find someway to spice things up – I hope you enjoy.  With all three of these all you need to do is add  some of the spice to taste to your chosen hunk of meat and then grill – and if the weather isn’t being kind – they work just as well in the oven.

Lemon & Lime Pepper – works beautifully on fish or chicken

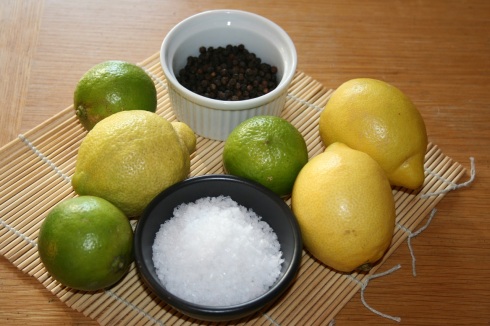
L&L INGTo start take:

  • the zest of three limes
  • the zest of three lemons
  • 1/3 cup of black pepper corns
  • 1/3 cup of salt flakes

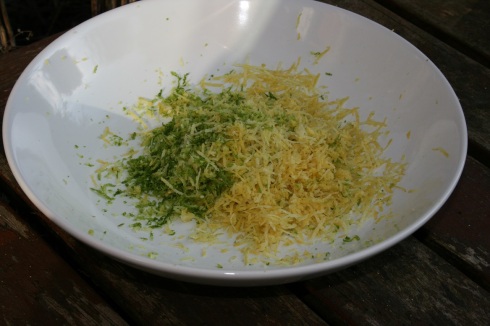
L&L ZestedHeat the oven to 120°C and line a baking tray with parchment paper.

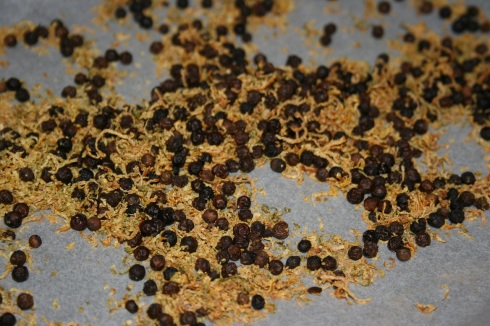
L&L DriedMix the pepper and the zest together and bake until the zest is completely dry – about an hour should do it.

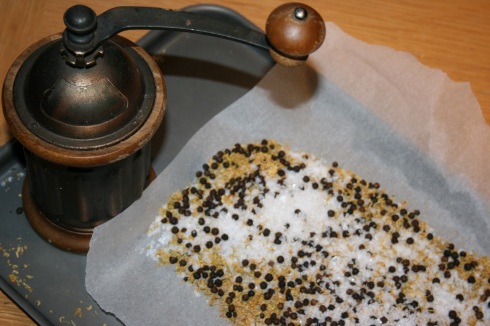
L&L GrindAdd the salt to the lemon/pepper mix and then grind.  You can use a mortar and pestle  – this will take an eternity or a coffee/spice grinder.  I have this beautiful old coffee grinder the BH gave me while we were still in Taiwan.  It started life as a coffee grinder, but is now dedicated to grinding spices.  Grind it all up and store in an  air tight jar.

Apple Spice – Brilliant on Pork

This is one of those spice that just kind created itself while I was staring at some pork loins.  I turned to the spice cupboard to find some inspiration and knocked over the fruit bowl.  I love it when stuff like that happens.

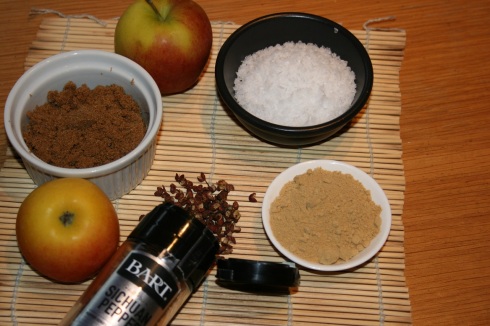
AP INGTo start take:

  • two or three apples
  • 1/3 cup dark brown sugar
  • 2 table spoons of Szechuan Pepper
  • 2 table spoons of ground ginger
  • 1/3 cup of salt flakes

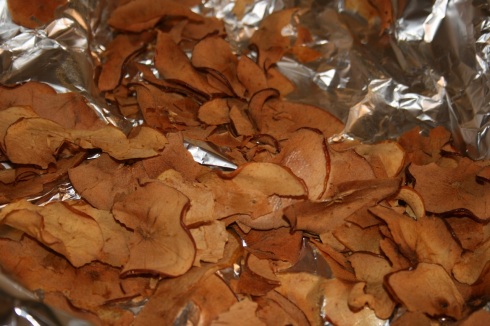
AP DriedHeat the oven to 120 °C.  Finely – like use a mandolin finely – slice the apples and place on foil or parchment paper.  Bake the apples for about an hour and a half and then turn off the oven and leave the apples in the oven until it has cooled or overnight.  Process the apples until they have been broken down into tiny pieces.  Mix the apple with all the other ingredients for the apple spice and grind into a very find powder.

Cajun Rub – Perfect on EVERYTHING from potato wedges to steak

So this is the first spice mix I ever made and nothing else has ever quite matched up.  It is used on almost everything in our household and it’s simplicity itself.

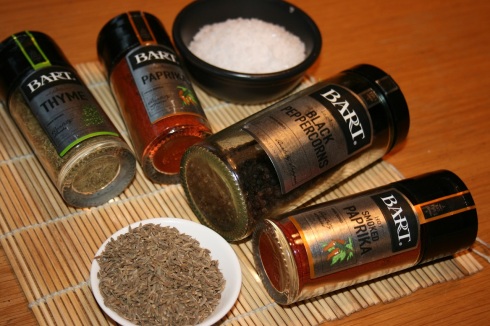
Cajun ING

To start take:

  • 2 tablespoons of cumin seads
  • 1 tablespoon of black peppercorns
  • 1 table spoon of salt flakes
  • 1 tablespoon of Paprika
  • 1 tablespoon of hot smoked Paprika
  • 1 tablespoon of dried thyme.

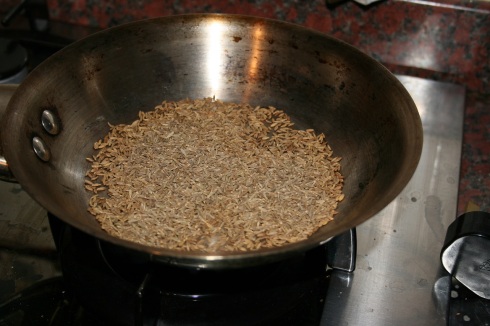
Cajun cumin toastingToast the cumin seeds in a heavy based frying pan until the seads are just starting to brown and pop.  Add to all the other ingredients for the Cajun rub and then grind together in a spice grinder. For the best potato wedges ever – cut your potatoes into wedges and place in a large bowl.  Add oil to taste and a teaspoon or three of the Cajun rub.  Toss to coat and bake the wedges at 200°C for about 40 minutes – potatoes perfected!

Thank you for my Versatile Blogger Award

23 Jun

Versatile  Blogger Award. 2jpg

I am just completely chuffed to bits with this award so a huge thanks to Nimmiafzal from Adorable Life for the nomination.  So the rules are relatively simple, you need to thank and tag the person who nominated you,  give seven facts about you and then nominate 15 other deserving bloggers.

SEVEN FACTS:

  1. I have lived in four different countries and while I have settled in the UK,  I hope I get the chance to live in a few more yet.
  2. I think about food CONSTANTLY, seriously I spend almost every waking moment thinking about  menus, recipes and what I’m making for dinner.
  3. I would love more than ANYTHING to work in a food related field,  but would hate to be a chef.
  4. I have been really privileged to count as members of my family some of the coolest dogs in the worldCaptain (28)
  5. I hardly ever make the same recipe twice,  I just can’t resist the urge to tweak things much to my better half’s dismay.
  6. I love writing and reading and long hot baths.
  7. I have a love/loath relationship with Tastespotting and Foodgawker.

versatile-blogger-award-5

. . . AND THE AWARD FOR VERSATILE BLOGGER GOES TO:

This was incrediblydifficult,  not only are there so many amazing blogs out there a LARGE percentage of my favourite blogs have already received a Versatile Blogger Award- so if I’ve nominated you for an award you already have I do apologise.

Coconut, Ginger and Lime Crème Brûlée

22 Jun

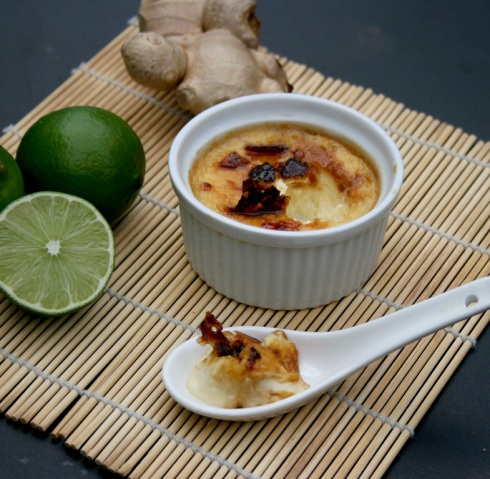
CB Square2I love my family and friends and my favourite thing in the world is cooking for the people I love. Sometimes however,  and before I hear any protests, I do appreciate this is through no fault of their own,  they make it a near impossible task.  I mean honestly, what can you make for dessert for a bunch that have among them the following dietary no-nos: lactose, gluten, any form of cheese and no meat whatsoever?  So, no cheese cake, no gelatine based desserts,  no ice-cream, no cakes or pies or tarts or cookies – which pretty much destroyed all the usual tricks I can quickly pull from my hat.

Secret confession time? I love challenges like this – and so to the internet to find solutions. Thanks to Tom Aikens for this amazing little number, which I’ve tweaked ever so slightly. I’ve used Asian flavours because we were having an asian inspired Barbecue,  but this is one of those wonderful desserts where the only flavour limit is your imagination – I think we’re doing a salted caramel one next or maybe one inspired by the Waterside Inn with pistachios.

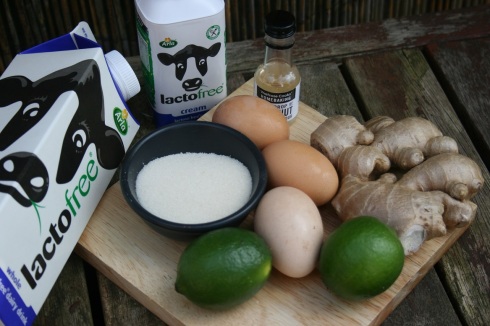
CB INGTo start take:

  • six egg yolks
  • the zest and juice of one lime
  • a piece of ginger about the size of your thumb (ish)
  • 75gm golden caster sugar
  •  extra golden caster sugar for the brûlée
  • 500ml lacto free cream (if you aren’t lactose intolerant use double cream)
  • 125ml whole lacto free milk (if you aren’t lactose intolerant use whole milk)
  • 2 tsp of coconut flavour

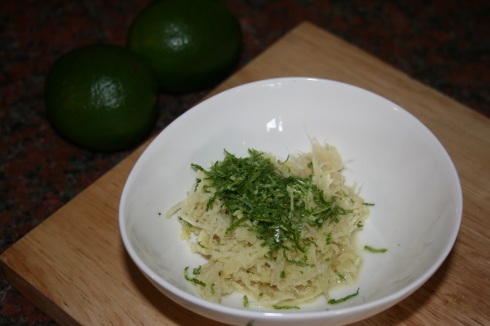
CB Grated Ginger and Lime ZestHeat the oven to 160°C and finely grate the zest off of your lime and grate the ginger.

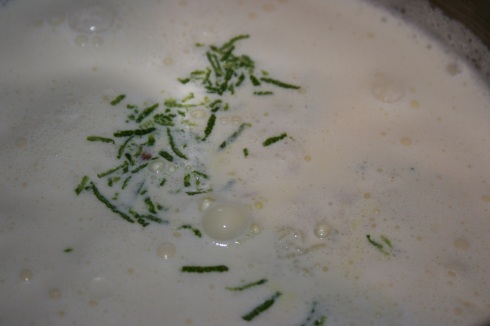
CB, Cream,  Milk, lime and gingerAdd the milk, the cream and the grated lime zest and ginger to a small sauce pan and slowly heat over a low flame.

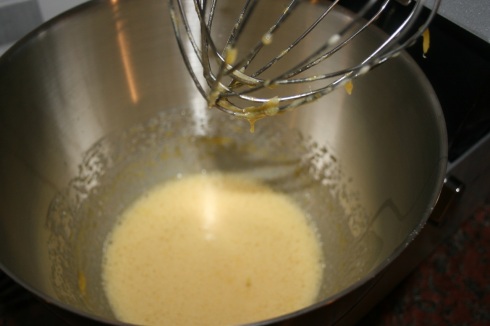
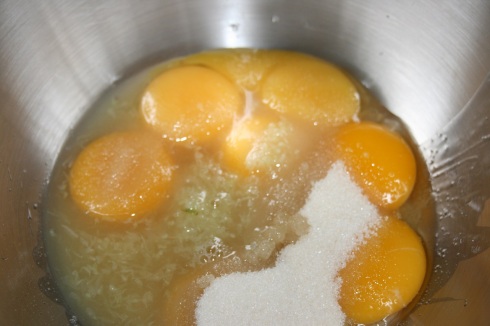
CB Eggs, sugar,  coconut and limeJuice the lime and then place the lime juice,  the egg yolks,  (save the whites for marshmallows or meringues) the caster sugar and the coconut flavour into a large bowl (or the bowl of your mixer) and whisk until pale and fluffy.

CB Eggs mixedOnce your egg mixture looks like the one above check on your milk/cream mix – it should be just shy of boiling.

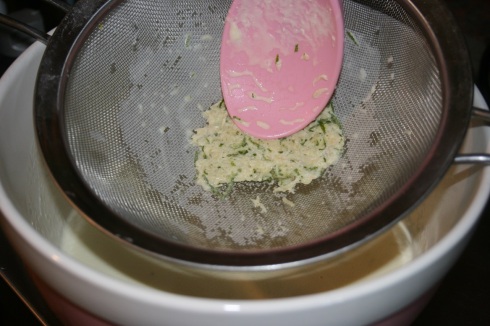
CB Strain CreamStrain the milk and cream mixture to remove the ginger pulp and lime zest – you want the crème to be smooth and creamy to contrast with the crunchy brûlée and if you leave the ginger and lime in,  it will just be gritty. Pour the strained milk/cream mix on to the egg mix and whisk the two together.

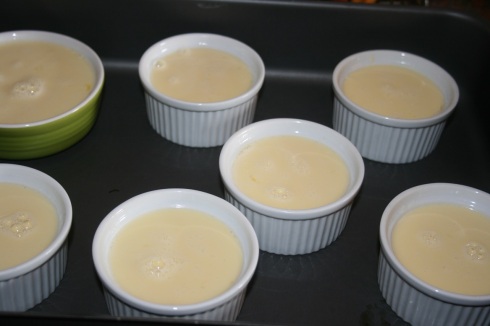
CB Unbaked Boil your kettle and fill a large,  flat bottomed, oven proof dish so that the water is about 1.5 cm deap.  Place the egg/cream mixture into your ramkins and place the ramkins into the oven proof dish. Place the dish into the oven and bake for about 45 minutes.

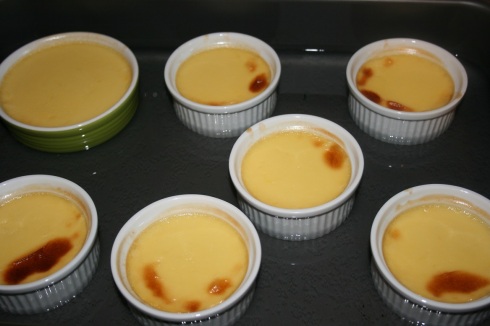
CB BakedThe tops of your custards should still have a slight wobble, BUT they SHOULD NOT be brown *blush*, but if they do brown a little, don’t panic, the brûlée will cover any errors.  Place the custards in the fridge for at least two hours or if you like to prepare ahead, overnight.

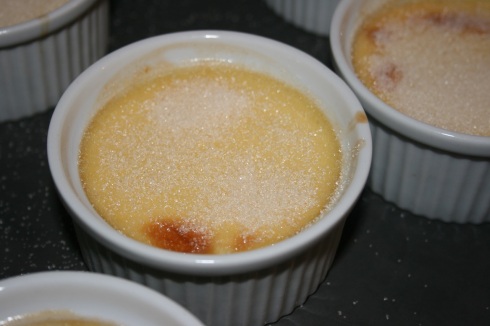
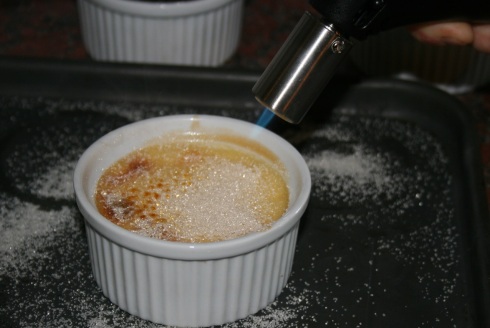
CB dust with sugarWhen you’re ready to serve dessert remove from the fridge and lightly dust the tops of your custard with a coating of golden brown sugar and then. . .

CB Blow TorchBURN BABY BURN   Lightly caramelise the sugar with a blow torch.  THIS IS THE MOST FUN EVER!  I may be a little sad.  If you don’t have a cooks’ blow torch run out and buy one now trust me you WILL thank me you can turn on the grill of your oven on to it’s highest setting and pop the dessert under the grill.  Keep an eye on the sugar and remove the moment sugar has melted.  Pop the desserts back in fridge for a few minutes to cool down and to harden the sugar and then dig in.

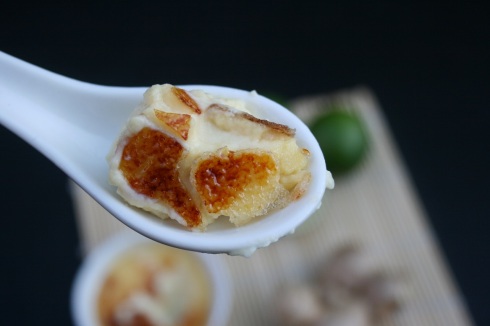
CB Finishing shot 2


Salmon and Avocado Bites

15 Jun

S&A 1 The English summer has hit and the weather has been about as lovely as you could hope for in England with long warm evenings that call for . . . nay DEMAND . . . drinks and nibbles in the back yard. Now that the BH and I finally have a back yard worth speaking of that’s where I want to spend my time.  So the search for yummy nibbles that takes no time a all to prepare (who wants to spend time in the kitchen when you can be enjoying the sunshine) is on all over again, but I think I have a winner with this one.

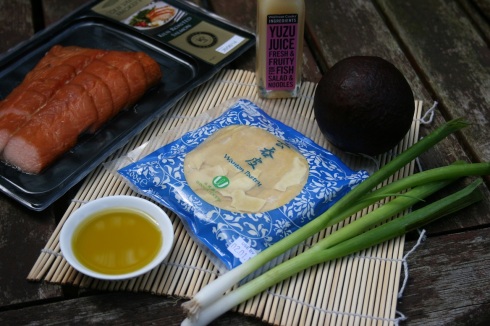
SnA INGTo start take:

  • a packet of wonton skins (you can pick these up at any oriental grocer)
  • Cooked smoked salmon
  • an avocado
  • one or two spring onions (to taste)
  • Olive oil (and toasted sesame oil optional, again to taste)
  • Yuzu juice
  • Salt and pepper (to taste)

I have very recently discovered Yuzu juice   (thank you Waitrose) and I am more than a little in love.  Its tartness cuts right through the richness of both the salmon and the avocado without being too sharp and it adds a really nice oriental touch to the dish.

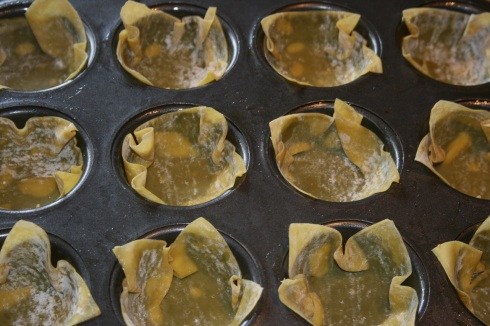
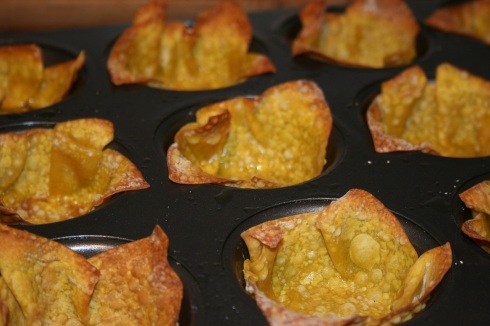
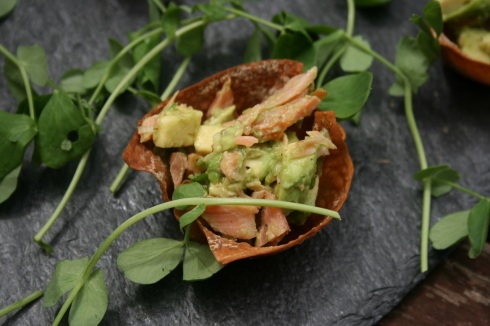
SnA WontonIn keeping with the oriental (ish) theme of these little yummies,  I decided to put the filling into wonton cups and not pastry cups.  This worked out really nicely as the wonton wrappers did not go soggy even though they were filled about two hours before serving. Heat your oven to 180°C .  Then brush a muffin tray with olive oil and then push the wonton wrappers into the tray to form little cups. Brush the pasty with a little more oil.

SnA WT crispPlace these in the oven and cook for about 8 to 10 minutes.  Keep an eye on these as they burn very easily.  If  you can’t find wonton wrappers or if you’re just feeling that industrious, check out Kitchen Simplicity’s blog on how to make them yourself here.

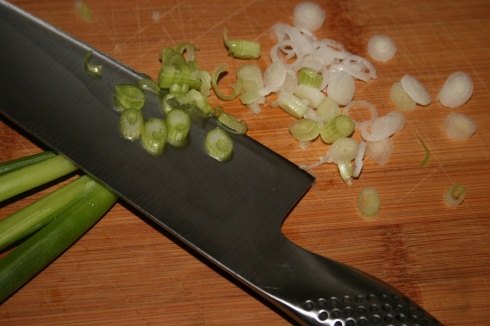
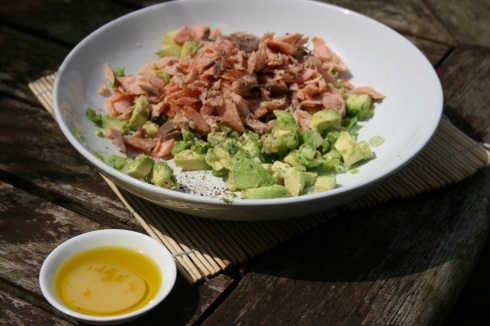
SnA Spring OnionWhile the wontons are browning,  make your filling.  Finely chop a spring onion, or two if you really like onions, and place in a bowl.

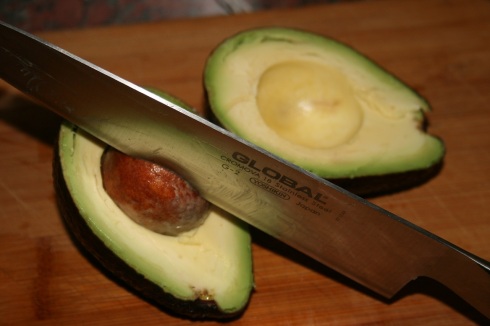
SnA AvoCube your avocado.  I’m going to let you in on a little secret.  If you want to know the best way to open, remove the pit and cube your avo, pay attention.  Take your sharpest knife and cut down until you reach the pit.  Then turn the avo keeping the knife touching the pit until the knife meets up with the original cut.  Put the knife down.  You should have a complete line running around the avo.  Take a side in each hand and twist and pull which should leave you with half avo in each hand.  Then take your knife and with some force,  but not too much, hit the pit.  Give the side of the avo with the pit in it a gentle squeeze and pull out the pit with the knife.  Now with the skin still on and not cutting through the skin, cut the flesh of the avo into cubes.  Then grab a spoon and scope the avo on top of the onion.

SnA FillingFlake the salmon with a fork and add to the avo and onion and then toss with a 50:50 mix of yuzu and olive oil.  You could substitute some of the oil with a little sesame seed oil for an extra flavour kick. Add salt and pepper to taste . To be fair at this point if you just wanted to eat this as a salad, no one would blame you.

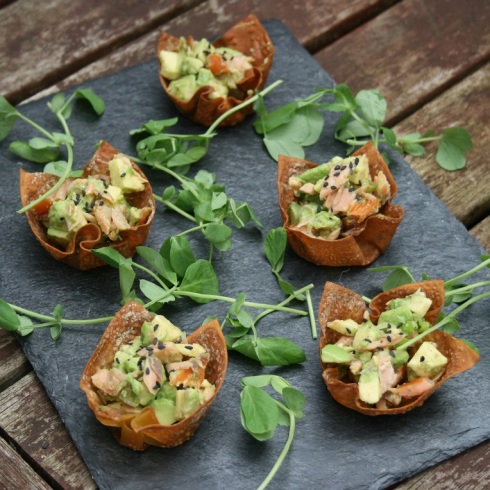
SnA ReadyOr,  you could of course, take the filling and and add it to the wonton cups and sprinkle on a few sesame seeds to up the impressiveness of the dish.  I hope you and  your guests enjoy.

Honeycomb Chocolate Fudge

17 May

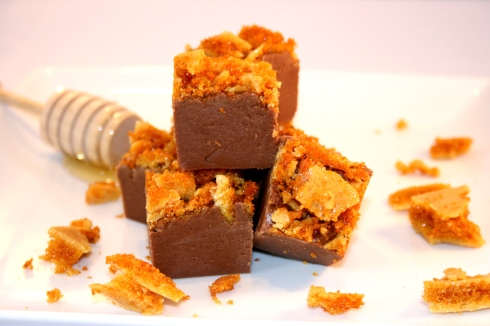
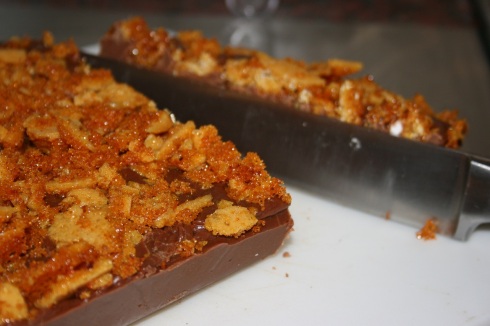
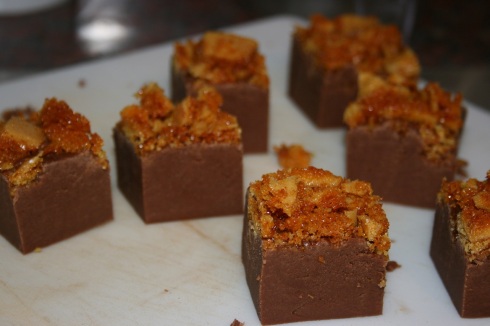
Honeycomb FudgeIt’s ridiculous,  I know.  Two and a half (ish) years of recipe sharing under the name Fudgingood  and not a single fudge recipe.  It’s not that I don’t like fudge,  it’s just that it’s not really terribly cullinarily  (I love invented words) exciting,  is it?  It’s sweet with a uniform texture and the flavour is very samey.  Then a friend asked me to make some additions for the sweetie table table at her wedding.  She loves honeycomb and so boom – this was born.  A nice contrast of soft and crunchy with the honeycomb adding depth  to the chocolatey goodness.  A definite winner.

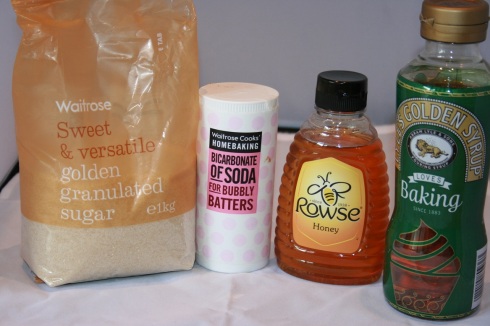
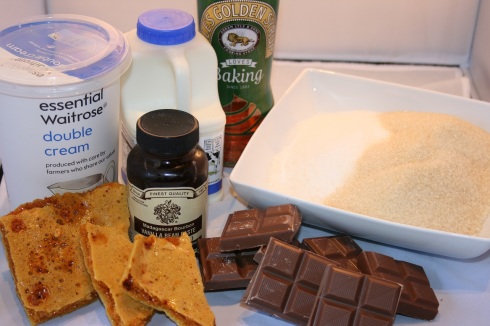
HC INGFor the Honeycomb take:

  • 200gm golden sugar
  • 2 Tablespoons of Honey
  • 3 Tablespoons of Golden Syrup
  • 2 teaspoons of Bicarbonate of Soda

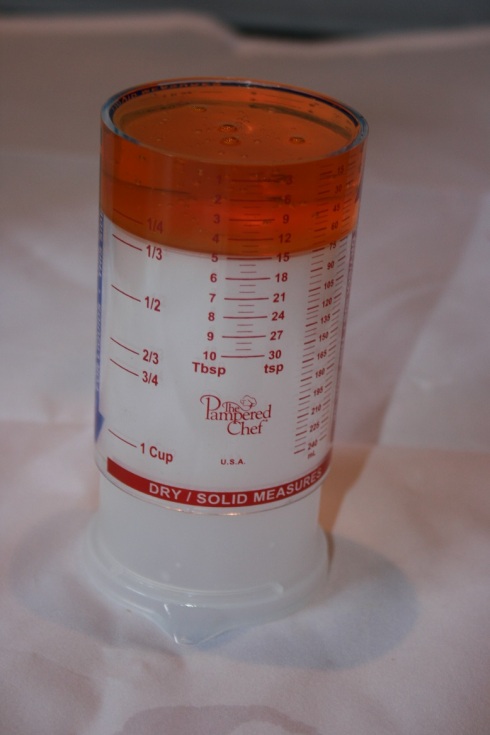
HC measureI must introduce my new favourite means of measuring out sticky substances,  like peanut butter, treacle and syrups.   This amazing plunger means that there is no scraping AND you never waste a single drop.  Check them out here.  So measure out your syrup and your honey.  Line a baking tray with parchment paper and set aside.

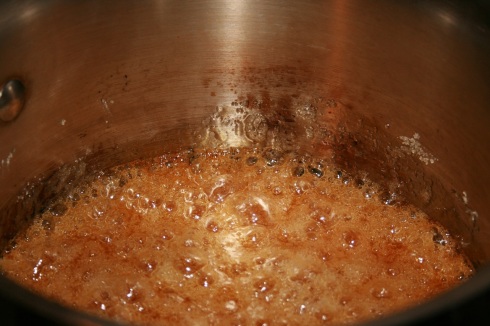
HC BubblingPlace the sugar in a heavy bottomed pan.  Add the honey and sugar and, without stirring,  bring to a boil.  Once the sugar has completely dissolved, allow it to boil for a further two or three minutes until it is a glorious amber colour.

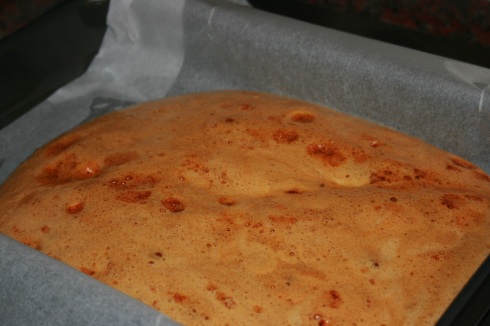
HC SetQuickly stir in the bicarb and pour into your preprepared tin and leave to set for about an hour or two.   You can of course stop here and break off yummy bits of honeycomb OR you could move on to the next level.

HCF INGFor the Fudge take:

  • 2 cups white sugar
  • 2 cups golden sugar
  • 1 cup milk
  • 1/2 cup double cream
  • 1/2 cup golden syrup
  • 1 teaspoon vanilla bean paste
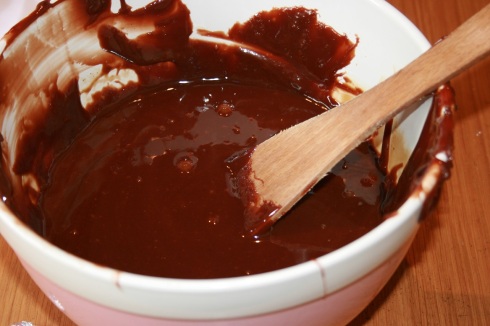
  • 200 grams dark chocolate
  • your beautiful homemade honeycomb

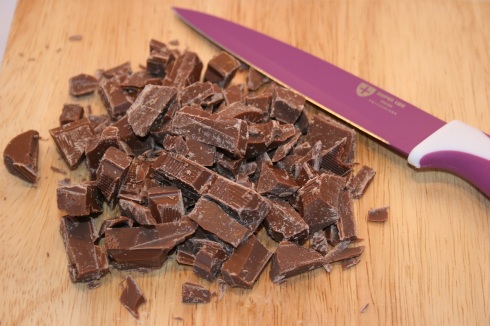
HCF Chopped ChocolateBefore you begin,   you need to prep the following.  Have a large baking tray, a large bowl and a wooden spoon and the container you want to set your fudge in ready.  Once that’s all sorted out, chop your chocolate into small chunks.

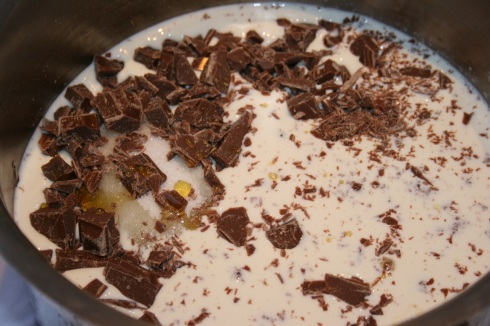
HCF CombinedAdd all the ingredients except for the vanilla and the honeycomb to a heavy bottomed medium sized pot.  When choosing your pot,  remember fudge always bubbles up more than you think it will.

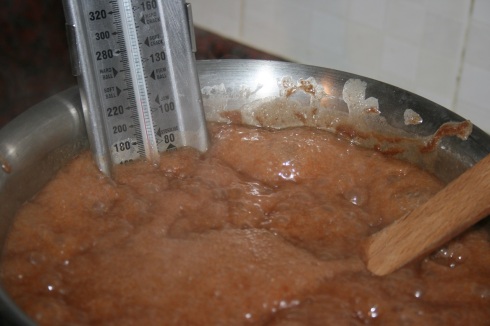
HCF BoilingPlace your mixture on a medium heat and,  stirring constantly, bring the mixture to between 115°C and 120°C depending on how firm you like your fudge.

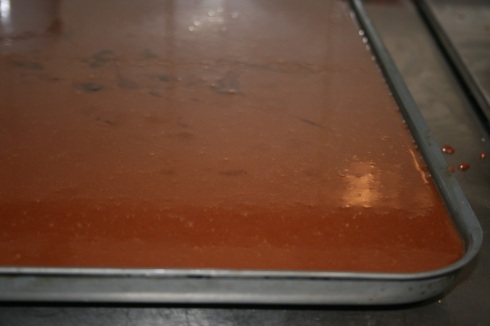
HCF coolingCarefully. VERY CAREFULLY pour your mixture on to your large baking tray and leave to cool, undisturbed for twenty minutes.

HCF StirPour your mixture into a large bowl, add your vanilla and stir vigorously for about 4 to 6 minutes.  You want your mixture to  loose its shine and just start to thicken. Pour the mixture into the container you would like your fudge to set in.

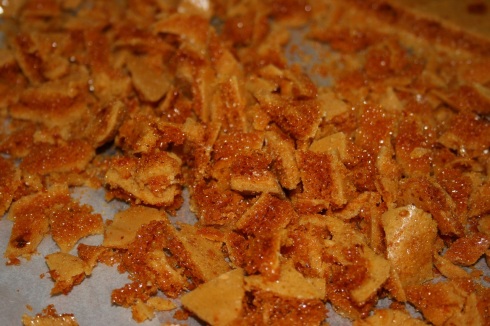
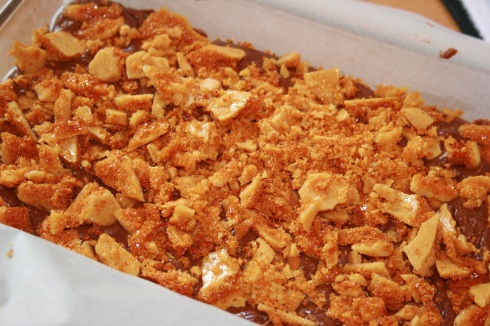
HCF Chopped HoneycombChop up your honeycomb into tiny pieces. HCF toppedPress the honeycomb into the setting fudge and leave the fudge to set for about two or three hours.

HCF SlicedUsing a sharp,  oiled knife, cut your fudge into squares.

HCF SquaresEnjoy the delight of a fudge that has contrasting textures and flavours.


Chicken, Chorizo and Chickpea Stew

11 May

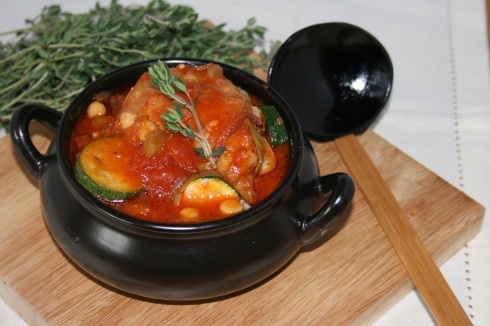
CCC Stew ServedI need to admit right away that there isn’t terribly much skill involved in this recipe.  In fact all you need to get it right are some chopping skills and a good dollop of patience. Although it’s an easy recipe, it’s not a quick one.  In fact it does take quite a bit of time, but when it’s a blustery, rainy day outside it is a recipe that is very soothing, both to prepare and to eat. You know how stress reliving punching a punching bag and imagining your boss/landlord/noisy neighbour/the guy who cut you off on your way to work’s face can be.  Well with this recipe there is an awful lot of chopping and trust me imagining the face of you boss/landlord/noisy neighbour/the guy who cut you off on your way to work under your knife is ENORMOUSLY stress busting.

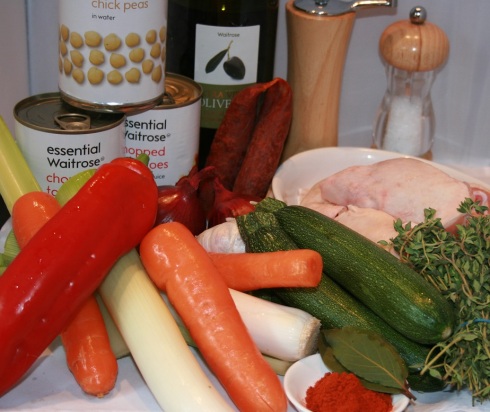
CCC Stew INGTo start take:

  • 6 chicken thighs
  • two small chorizo sausages
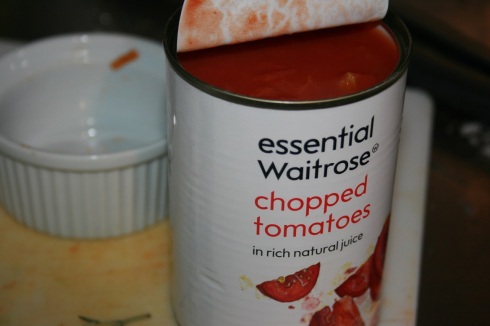
  • 2 tins of chopped tomato
  • 1 tin of chickpeas
  • 2 onions
  • a few garlic cloves (to taste)
  • 2 leeks
  • 2 stalks of celery
  • 3 carrots
  • 1 red pepper
  • 3-4 courgettes
  • olive oil
  • salt, pepper and smoked parika
  • Fresh Thyme (to taste) and a Bayleaf or two.

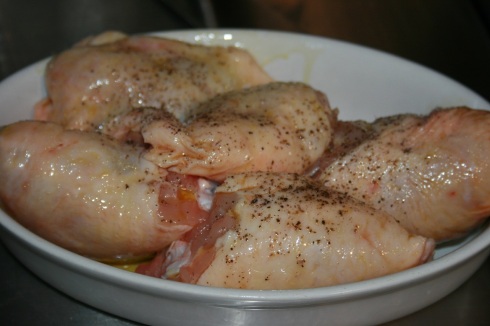
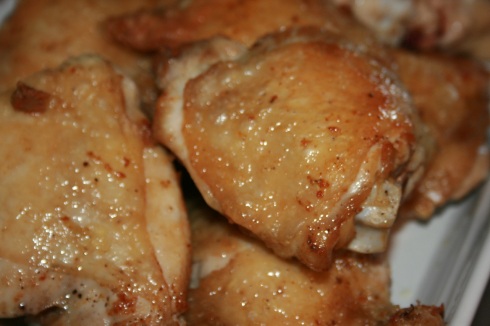
CCC Stew ChickenRub the olive oil into the chicken breasts and season them with salt and pepper.  Heat your largest wok and place the the chicken skin side down in the pan.

CCC Stew Crisp ChickenCook on both sides for ten to fifteen minutes until the juices from the chicken clear and the skin is golden and crispy. Remove the chicken from the pan, but leave the oil that has been rendered from the chicken in the pan.

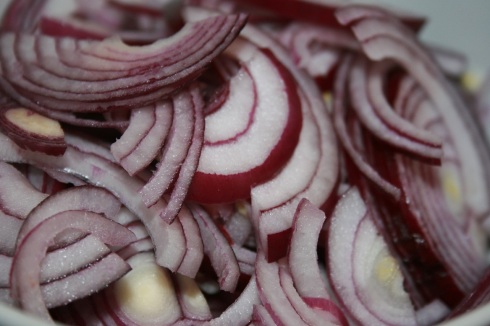
CCC Stew OnionsFinely slice the onion imagining your boss/landlord/noisy neighbour/the guy who cut you off on your way to work’s face under your knife.

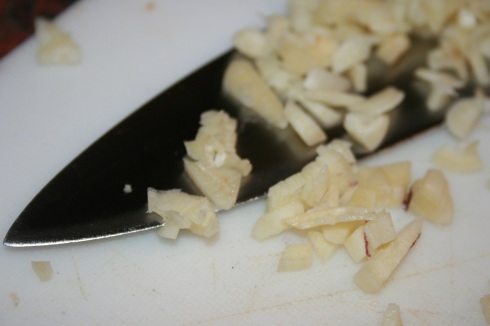
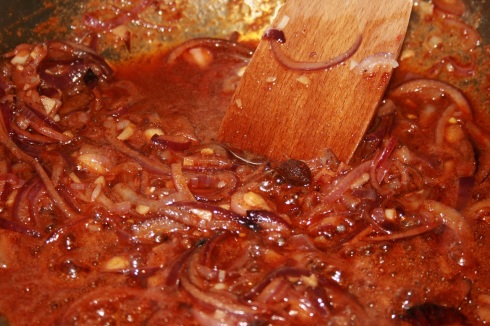
CCC Stew GarlicChop the garlic into really fine pieces and then add both the onion and the garlic to the wok with the chicken oil and cook over a low heat until soft and translucent.  This should take about 5-10 minutes (Did I remember to mention the  patience as well as chopping skills needed for this ? )

CCC Stew Softened OnionsAdd the smoked paprika to the onions and leave to simmer and then chop the rest of the vegetables.

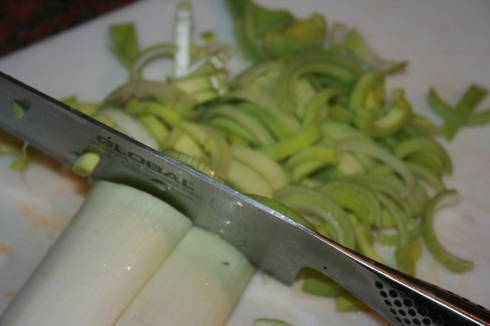
CCC Stew LeeksChop the leeks and celery into very fine pieces.

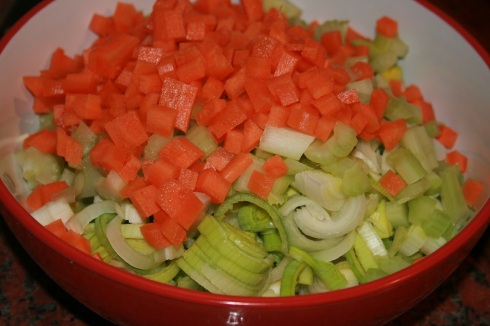
CCC Stew CarrotsDice the carrots.  Each of these ingredients adds a beautiful level of flavour to the dish, the carrots add a soft sweetness and the celery a delicious pepperiness.

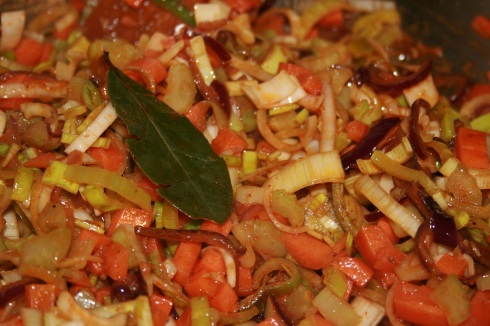
CCC Stew with Bay LeafAdd these ingredients along with the bay leaf to the onion mix and allow it to all soften together.

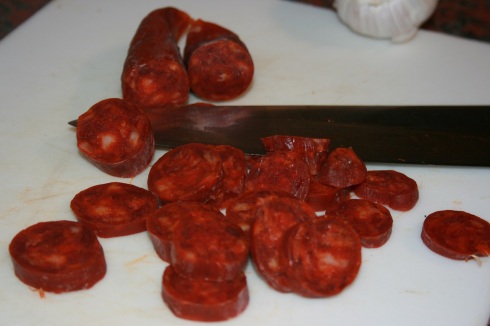
CCC Stew ChorizoChop your chorizo, courgettes and red pepper and add to the vegetable mix in your wok and cook on a slow heat to let the flavours mingle (about 10 mins)

CCC Stew TomatoOpen your tins of tomato and your chickpeas, add them to your veggie mix.

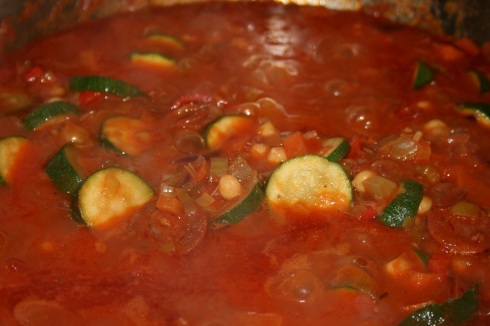
CCC Stew BoilBring your stew to the boil and allow it to thicken for about 10 to 15 minutes. Add the chicken and let it cook over a low heat for about half an hour.

CCC Stew Served

Serve with rice, cous cous or mashed potato!  Enjoy.


Salted Caramel Marshmallow Pops

9 May

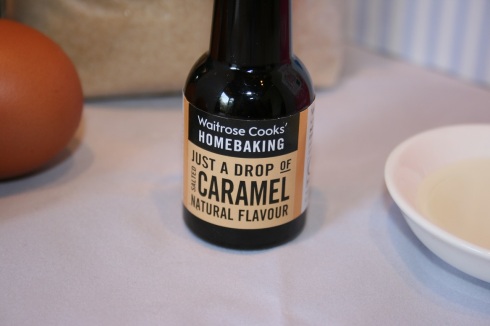
Food Gawker Submission 3Sometimes when browsing the supermarket shelves (fess up, we all do it) you spot an ingredient that makes you go Oooooh, and then Hmmmm and before you know it you’re that crazy lady standing still in the aisle muttering to yourself, envisioning all the things you’re going make with your amazing new find.  I do this more than I like to admit, but that’s not the point, the point is Oooooh, look what I found.

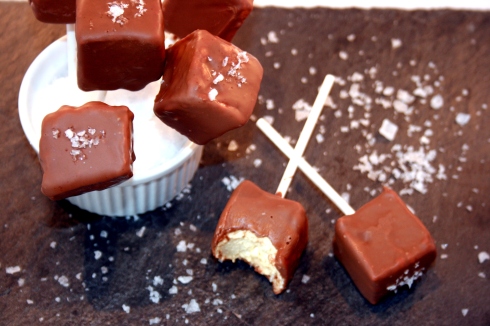
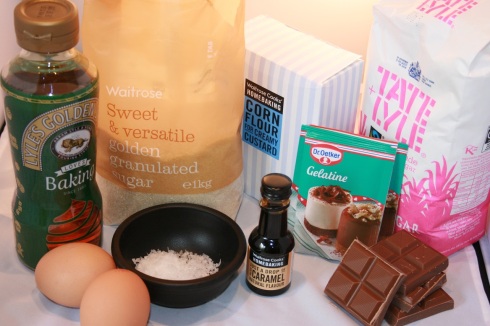
MP FlavourThat’s right SALTED caramel flavour.  Can we all say YUM!  So salted caramel . . .  salted caramel marshmallows . . . on a stick . . . covered in chocolate.

MP INGTo start take:

  • 2 egg whites
  • 2 tsps Salted Caramel Flavour
  • 400gms golden caster sugar ( you can use white, but golden will give a more caramelly flavour and yes, caramelly is a word.
  • 400 ml cold water
  • 36 gms powdered gelatine (about 4 tablespoons)
  • 20mls of golden syrup
  • 1 tsp salt
  • icing sugar and corn flour in equal measure to dust
  • 200 gms chocolate to coat
  • salt crystals to decorate

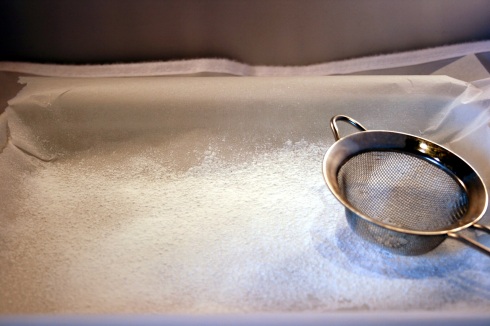
MP Sifted SugarLine a baking dish (mine was 29cm by 24cm) with parchment paper and sift some of the corn flour icing sugar mix on the bottom.

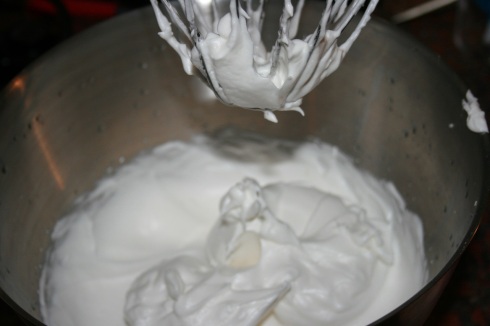
CM Egg WhiteIn a heat proof bowl, whisk the egg whites until they form firm peaks.

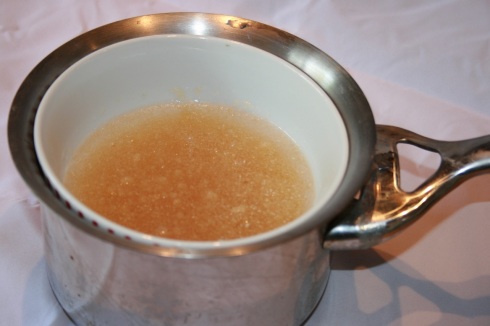
MP GelatinPlace some water in the bottom of a small pot and then create a double boiler by placing a bowl in the pot.  Make sure the water doesn’t touch the bottom of the bowl.  Add 200mls of water to the bowl and sprinkle the powdered gelatine on top of the water.  Set this aside.

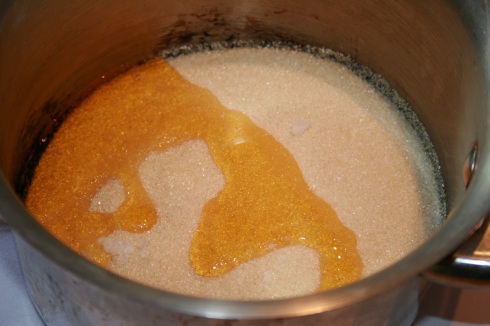
MP MixutreAdd the sugar,  the syrup, the salt and the water to a medium sized pot and place over a medium heat.  Bring the sugar mix to a boil and cook until it reaches 130°C,  or 266°F for those of you across the pond.  A few minutes before the mixture reaches 130°C, place the pot with the bowl of gelatine on a medium heat and warm until the gelatine has completely dissolved.  Once you’ve reached 130°C, remove the sugar mix from the heat and add the gelatine mix to it.  Be careful, the mix WILL bubble up.

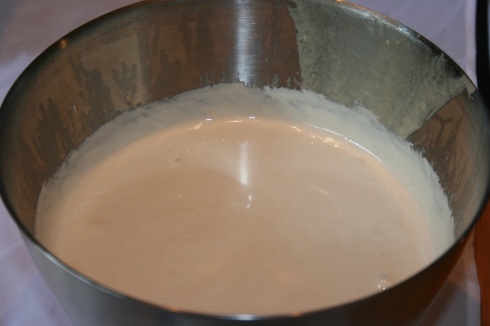
MP BeatenWhisk up your egg whites one more time and then, with the electric beater still whisking, slowly pour the sugar syrup on the egg whites until it has all been absorbed. Continue whisking until the mixture thickens and resembles the mixture in the bowl above.  This should take about 7-8 minutes.

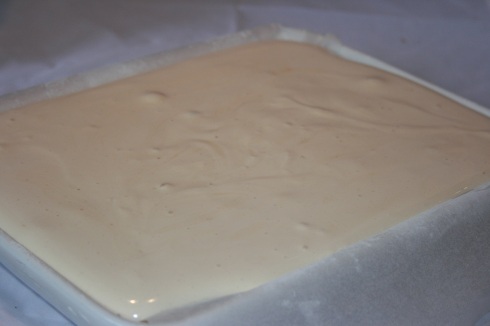
MP SettingPour the mixture into your prepared baking dish and leave to set (about 4 hours)

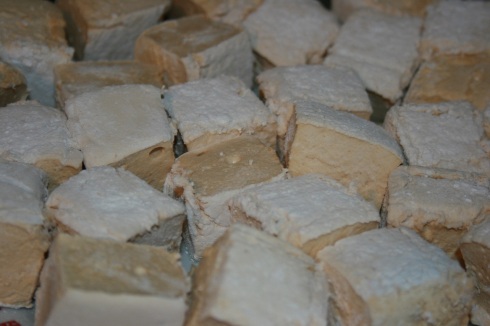
MP CubedSprinkle  a chopping board with your corn flour, icing sugar mix and turn your marshmallow slab onto the chopping board. Then using your sharpest knife (either oil it or coat it in your corn flour, icing sugar mix) cut your marshmallows into cubes.

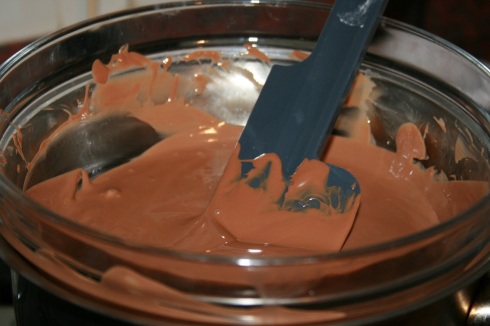
MP Melted ChocolateMelt your chocolate, either in a microwave or in a bowl over a pot of just simmering water.

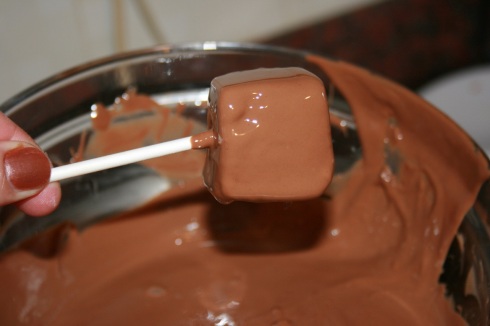
MP DippedStick a cake pop stick into your marshmallow and dunk it into the chocolate.  AVOID the temptation to pop the whole lot in your mouth at this stage.  Or maybe try just one . . . you know in the interests of quality control 😀

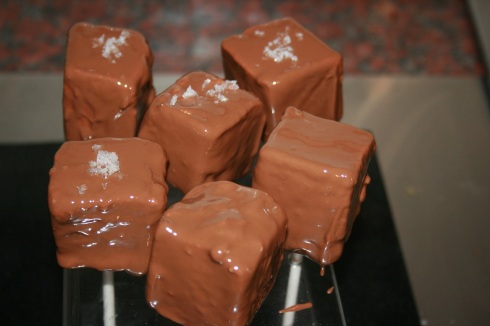
MP coolingOnce your pops have cooled slightly, but are still tacky, sprinkle a some salt crystals on top.  If you put them on while the chocolate is too warm they will dissolve.

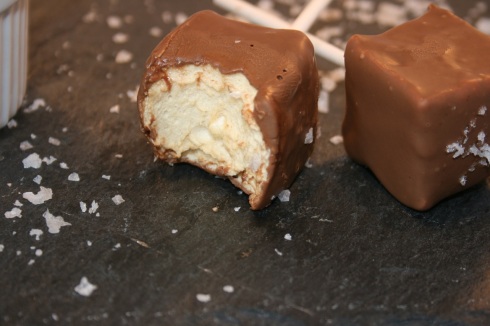
MP BiteEnjoy the squishy awesomeness!


oh.four.one.

the port elizabeth blogger

The Banting Cook

Banting recipes – low carb, sugar free and gluten free. Banting recipes I have tried - those that have failed and those that have been a success! I am not a dietician, I'm just a gal who loves to cook banting food, and keep it as good as possible! Obviously all recommendations throughout this and other posts are not intended as an alternative, treatment, or prevention of diseases, medical treatments or advice. The reader takes full responsibility for counting nutritional information such as carbs, while trying any and all recipes :-)

Primal Perks

Passionately sharing info about the paleo/primal, high fat/low carb diet and lifestyle

Mrs Stanton's Makes

Bake. Craft. Review. Create.

China through the Eyes of a Chinese-American.

Trying to make my difference in the world by teaching English in underdeveloped China for the next two years as a Teach for China Fellow.

Carlygrey

Photography and Adventure - Greater Things to Come

The epicurean kitten

Not what we have, but what we enjoy constitutes our abundance, Epicurus

Whole to the Core Blog

Being fit and healthy. Living the Abundant Life

Love.Food.Asia.

the taste of asia

alifemoment

Colourful Good Food & Positive Lifestyle

MY FRENCH HEAVEN

Food, Photography & Joie de Vivre

LOOK WHAT I MADE ...

A handcrafted life is a happy life.

andcece

eat. sleep. adventure.